Ooma Telo Login Overview
Setting up your VoIP device is often the first step to ensuring a seamless functional experience and it is no different for the premier residential VoIP provider, Ooma. One important thing in getting it setup is figuring out how to navigate your login console and be able to quickly and easily access your account in order to make any change as needed.
Navigating the log-in module is imperative to ensure you can access your Ooma account and profile at all times, in order to opt-in and out of emails based on your usage preferences (including, but not limited to notifications of service changes, account updates, payment updates, interruptions, or special offers and deals available to you). Most of all, your account signin is the simplest way for you to add minutes, change your plan, prepay for international calls as needed or change your number. Once you get the login process down you can go in at any time and make changes as you see fit.
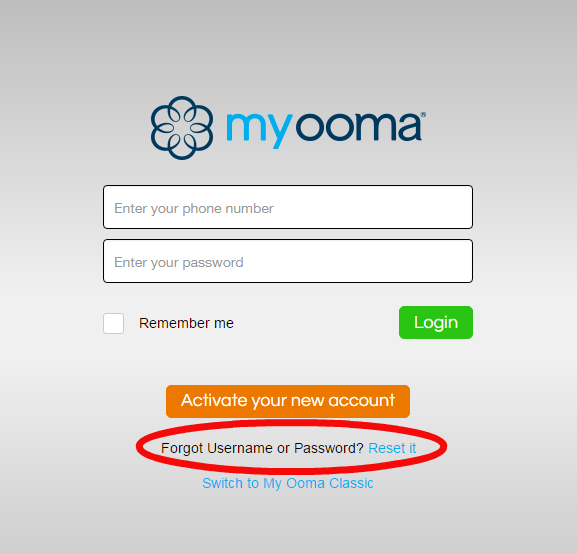
The new Ooma login page is a typical interactive entry point page. While the lack of mobile-friendly / responsive design might be a minor gripe for some, most of us setup our Ooma Telo device at home first, so it isn’t a downer to the majority. Clear call-to-action buttons lead you to either account Activation or Login options if you already had a prior account. You may also switch to “Ooma classic” view if that’s more familiar to you from the days when Ashton Kutcher was their creative director.
Creating Your Account
If you are new to Ooma you will have to create an account before you can login and change or make your initial account sets. This is easily done on the login page (as seen above) by clicking on the ‘activate your new account’ button. Once done the page will prompt you for the activation code that came with your Ooma Telo device. Enter it and then proceed with our Ooma setup instructions.
Forgot Your Password
If you have forgotten a prior set of credentials, this can be quite frustrating and Ooma knows that as well as you do. This is precisely why they have setup a process to allow for you to easily reset your password. When on the login page all you have to do is simply click the ‘Reset It’ link and within a few seconds to few minutes you will receive an email with directions on how to reset your password. Once reset you should be able to sign-in immediately and have access to your account restored.
Telo Router Login
Your My Ooma Account login isn’t the only place you will need to login to when it comes to Ooma. You will also need to know how to Login to your Ooma Telo Router in order to complete the Ooma installation process. This process can be somewhat challenging for those without much of a technical background. For directions on that please see below.
Find The Login IP Of Your Telo
The Ooma Telo router, like any network device, needs to be recognized as an internal device for your residential internet/ Wi-Fi service. For that to happen, you’ll need the IP address of your Ooma router.
There are two standard IPs that Ooma routers are set to:
192.168.1.1
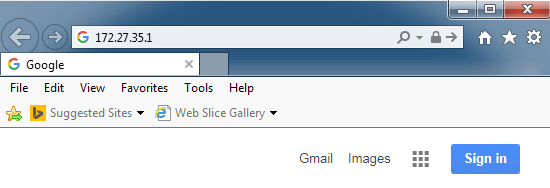
172.27.35.1
The way to confirm that your router is detected is to proceed with the following steps
- Connect your router, and another computer to the same internet connection.
- Confirm both devices are on, and that they are not behind a proxy or firewall which masks their IP detection.
- Open up command prompt on your computer and try pinging 192.168.1.1 or 172.27.35.1 – one of them should respond if your router is up and running the right way. For certain devices, an alternative you can try is to enter setup.ooma.com as the router IP.
Router Login Process
Now that you have a confirmed internal IP, type it up in a web browser of your choice. (We’re using Internet Explorer 12 for the example below).
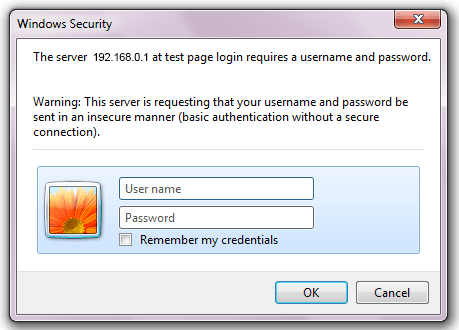
Once you press Enter/Return on your keyboard, a pop up box requesting your credentials appears on the window. Enter your information to proceed to the Ooma Telo home.
First time users, try username: unknown and password: unknown (default values) to log in, and then update your information in the account center for future use. Once you see the login/ welcome page, you can update or change the internal login IP, or update relevant account information.
Telo Login problems
Depending on your browser settings, device configuration, or internet protocol, there could be a few hurdles you may run into when trying to login.
Q. My browser doesn’t detect the Ooma internal device IP (Diagnose connection problems message).
Check your browser security settings to moderate/ low to allow pop-ups. You may restore it to default later. Also ensure there are no active firewalls or anti-virus programs preventing a connection.
Q. Need to reset device because password doesn’t work.
If you haven’t been able to login despite the steps above, you may need to reset your router. Call the internet service provider to re-set your wi-fi or internet router first. The next step is to try to reset your Ooma Telo Router, which is pretty simple. Just find the tiny reset button located on the Telo device. While the router is turned on use a paper clip or safety pin to press and hold the reset but for about 10 seconds or until the lights on your Telo starts blinking. Once the lights begin blinking you can let up and our Telo device should be reset.
Once you have successfully connected your Ooma Telo router to your internet device, and logged in, it may take a few minutes to download some software updates in some cases. If it does so, wait until the device automatically reboots, and all the device lights are blue again. You are now logged in and ready to use your Ooma Telo Router. There is no fee except the government taxes and fees which usually ranges from $5-$10 per month
Updating Your Telo IP Configuration
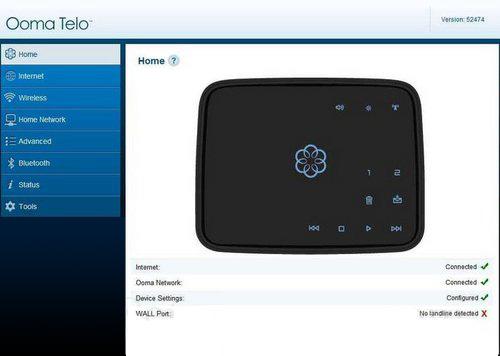
The login/ welcome screen looks like this:
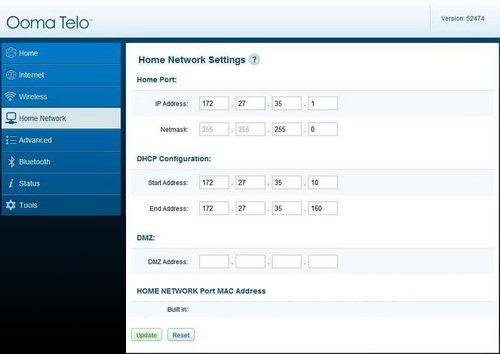
To configure the router, or change the LAN IP, click on the “Home Network” link on the panel to the left (the 4th link). It takes you behind your internal IP on your local internet network connection – your Ethernet, or Wi-Fi connection which all your devices (personal computers, mobile phones, Ooma Telo Router) are all connected to. You will navigate to the screen below:
Change the values in the four boxes labeled IP Address, to the new address of your choice. Do NOT change the netmask value (255.255.255.0). Click on the green “Update” button to finish your changes.
Changes to device configuration will require a reboot of your router before they take effect. The router may need a few minutes to update all internal software configurations to recognize the new IP address and connect back to internet once again.


